How to Complete Your Account Setup
After creating your organization, TimoDesk guides you through a quick onboarding process. Completing this setup ensures your workspace is properly configured for time tracking, projects, and team collaboration.
Account Setup Preview

Email Verification
Email verification is required to secure your account and enable member invitations.
-
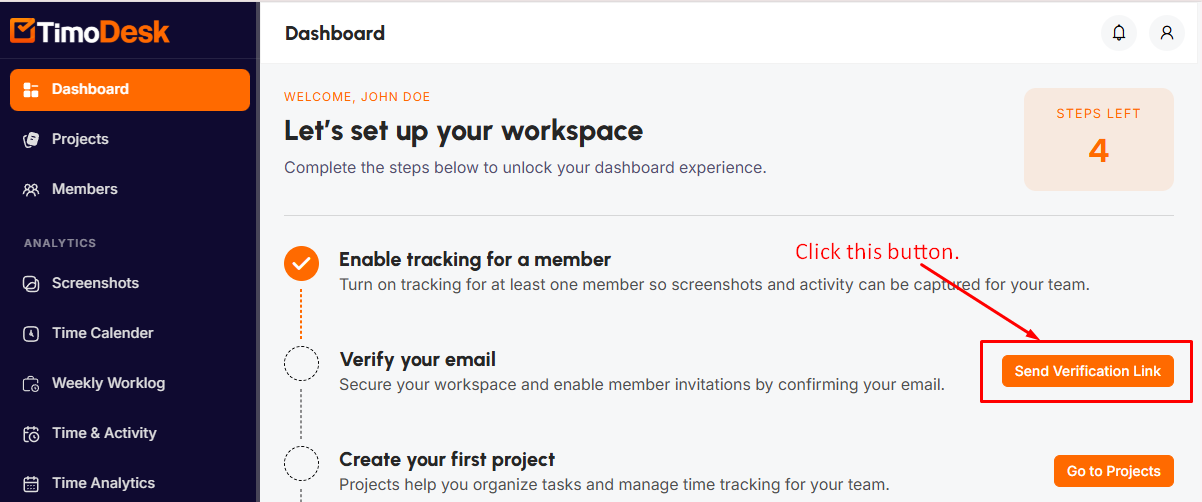
Step 1:
Go to the TimoDesk dashboard and click the Send Verification Link button. It'll send an email to your mailbox with a verification link.
 If you don’t see the email, check your Spam/Junk folder or click Send Verification Link from the dashboard again.
 - Step 2: Open your email inbox.
-
Step 3:
Find an email from TimoDesk with the subject: "Verify Your Email Address to Get Started with TimoDesk"

-
Step 3:
Click on the subject and open the email. You'll find a verify now button here. Click the button to verify.

After verification, the step will automatically update in your dashboard.
Create Your First Project
Creating at least one project is required to begin logging time.
-
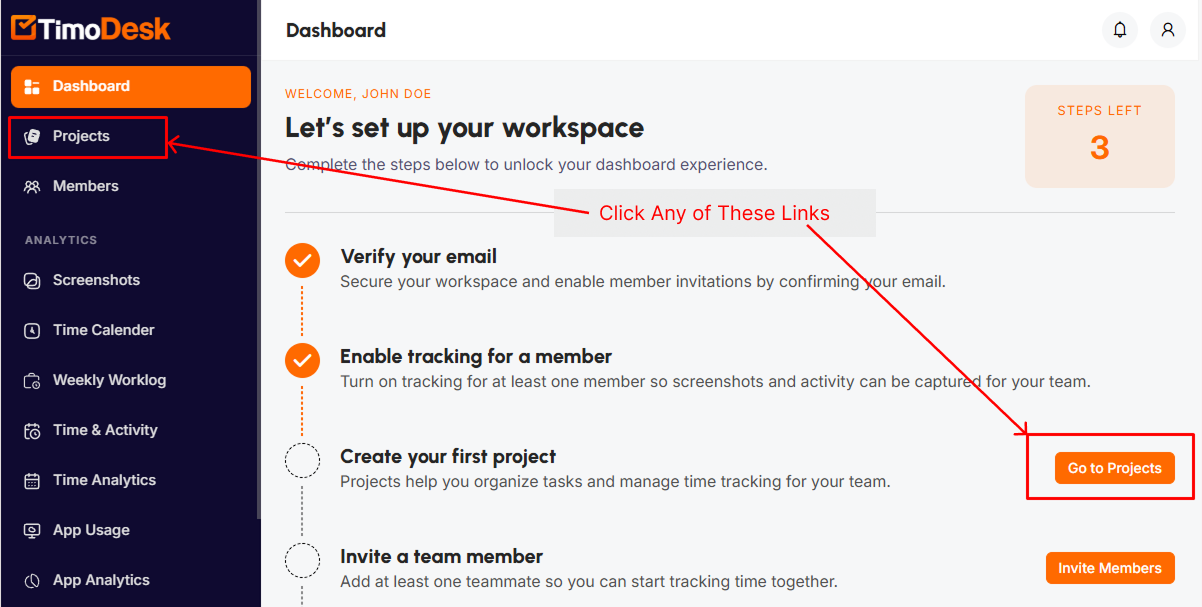
Step 1:
Go to the TimoDesk dashboard and click the Go to Projects button. It'll redirect you to the projects page to add new project.
-
Step 2:
In this screen, click on the Create your first project button. It'll show you a popup to create the project.

-
Step 3:
Enter the following information:
-
Title
Name of the project. The name will appear many places of the system -
Icon
This is an optional field. If you add the icon, it will be resized to 128x128px -
Description
This is also an optional field. You can add some note here about the project. -
Assign Member
You'll find a list of member of your team to assign them the project. You can assign all by clicking the Add All button. Initially the field is optional, means you can create the project without assigning any member initially. You can assign member later.
After completing required input, click on the Submit button. It'll create your project on the TimoDesk.
Keep project names simple and clear, especially if you plan to create many projects (e.g., "Website Redesign", "Marketing Campaign", "Mobile App Development").
-
Title
Invite a Team Member
Add at least one teammate so you can start tracking time together.
Timodesk allows three ways to add members: Send invitation to email, Invite via link or Create member's account. The Add Member page of the documentation has described briefly about these three method of inviting a member to an organization.
-
Step 1:
Go to the TimoDesk dashboard and click the Invite Members button. It'll redirect you to the members page to invite new member.
You will notice that one member your own account is already listed by default. From this page, you can add additional members to your organization.
-
Step 2:
Click the Add Member button. It'll appear a pop-up to invite member. Make sure that you've already verified your email. Email verification is required to invite a member to the organization.

-
Step 3:
After clicking the button, you'll find this type of popup. Follow the invite member instruction to add member to the organization.

Assign a Project to a Member
If no projects have been assigned to any member yet, this step will continue to appear. You can assign a project to a member by clicking the "Assign Project" button.
-
Step 1:
Click the "Assign Project" button. It'll redirect you to the project list page.

-
Step 2:
Click the "Details" button of the project that you want to assign. It'll move you to the project details page.

-
Step 3:
In this details page, click the "Assign Members" button. It'll appear a popup to assign members.

-
Step 4:
Search the member name you want to assign or click Add All button if you want to assign all members.

-
Step 5:
After selecting members, click the Submit button. Your project has assigned to your team members.

Once assigned, the member can create task and start tracking time using the desktop app.