Project Management
Project Management in TimoDesk helps you organize your work, assign responsibilities, track time, and monitor activity. This section explains how to create, manage, and assign projects and tasks within your organization.
Create New Project
- Step 1: Go to the "Projects" page from the sidebar links of the TimoDesk dashboard.
-
Step 2:
Click the "Add Project" button of the page. It'll open a popup for add project.

-
Step 3:
Enter the following information:
-
Title
Name of the project. The name will appear many places of the system -
Icon
This is an optional field. If you add the icon, it will be resized to 128x128px -
Description
This is also an optional field. You can add some note here about the project. -
Assign Member
You'll find a list of member of your team to assign them the project. You can assign all by clicking the Add All button. Initially the field is optional, means you can create the project without assigning any member initially. You can assign member later.
After completing required input, click on the Submit button. It'll create your project on the TimoDesk.
Keep project names simple and clear, especially if you plan to create many projects (e.g., "Website Redesign", "Marketing Campaign", "Mobile App Development").
-
Title
What Does the Project Page Contain?
The project list provides a quick overview of all projects within your organization. Each column displays essential information to help you monitor project progress and manage resources efficiently.
-
Title
The name of the project. Clicking on the title takes you to the Project Details page. -
Assigned Members
Shows how many team members are assigned to this project. This helps you understand team distribution at a glance. -
Total Tasks
Displays the total number of tasks created under the project. -
Time Tracked
Shows the cumulative hours logged by all assigned members for this project.
Project List Preview

What Does the Project Details Page Contain?
The Project Details page provides a complete overview of a specific project, including its performance, assigned members, tasks, and activity statistics. It serves as the central control panel for managing everything related to the project.
Below is a breakdown of each section displayed on the Project Details page.
Project Details Preview

-
Project Header: This section shows the essential project information.
-
Project Name
The title of the project (e.g., TeraFluxStar). -
Project Description
A short description or note about the project. -
Edit Button
Allows you to edit project details such as name, description, icon, assignment.

-
Project Name
-
Project Summary Cards: These summary widgets give quick insights into project performance.
-
Today's Logged Hours
Total time tracked by all members for the current day. -
Total Logged Hours
The cumulative time tracked since the project was created. -
Average Activity
The average activity percentage determined by TimoDesk’s activity-tracking algorithm metrics. -
Total Tasks
The total number of tasks created under this project.

-
Today's Logged Hours
-
Members Section: This section lists every team member assigned to the project.
-
Member
Profile photo and name of the assigned member. -
Total Worked
Total time the member has tracked on this project. -
Activity Percentage
Average activity level recorded for a member. -
Action
Option to assign or unassign the member from the project.

-
Member
-
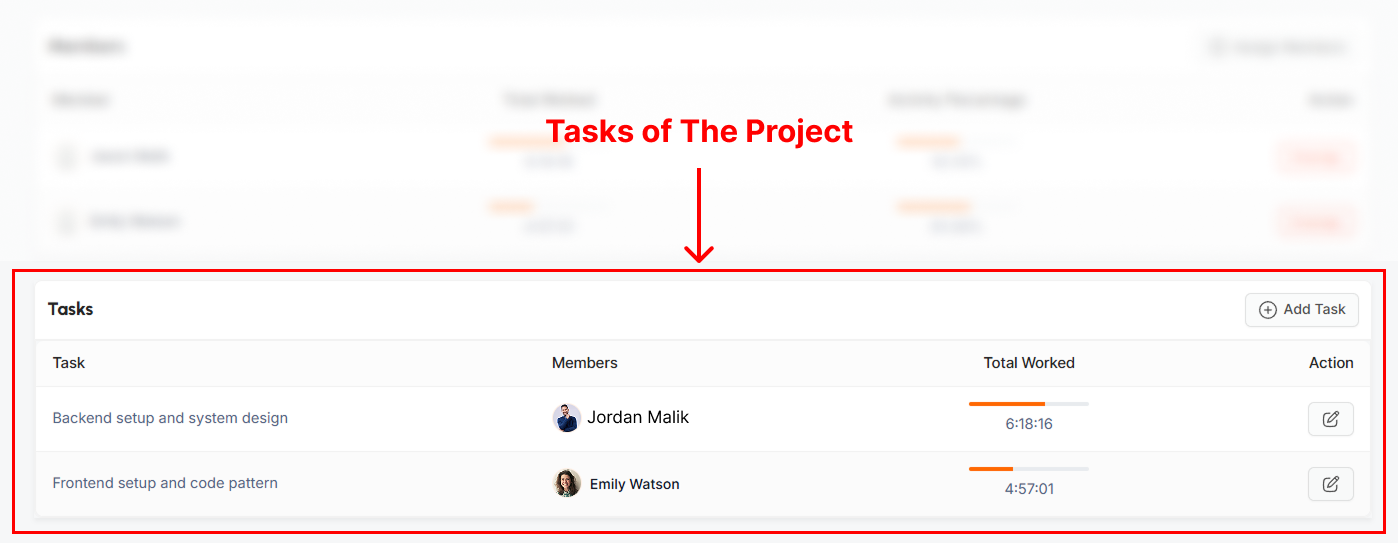
Tasks Section: This list displays all tasks created under the project.
-
Task
The name of the task. -
Members
Members assigned to work on the task. Only members assigned to the project can be assigned to tasks. -
Total Worked
Total time tracked for each task. -
Action
Option to Edit the task or manage assignments.
-
Task
How to Assign or Unassign a Member?
TimoDesk provides convenient ways to assign or remove team members from a project. This ensures you can manage project participation quickly and efficiently.
How to Assign a Member
You can assign members using either of the following methods:
-
Using the Edit Project Button:
-
Step 1: From the Project Details page, click the Edit button in the top-right corner. It'll popup a form to edit the project.

-
Step 2: In the project edit form, locate the Assign Members section.

-
Step 3: Click on the Assign Members input. It'll show you a member list. Select one or more members to assign.

-
Step 4: Click Submit button to apply the changes.

-
Step 1: From the Project Details page, click the Edit button in the top-right corner. It'll popup a form to edit the project.
-
Using the Member List Card:
-
Step 1: Scroll down to the Members section of the Project Details page.

-
Step 2: Click the Assign Members button.

-
Step 3: Click on the Assign Members input. It'll show you a member list. Select one or more members to assign.
-
Step 4: Click Submit button to apply the changes.
-
Step 1: Scroll down to the Members section of the Project Details page.
How to Unassign a Member
There are also two ways to unassign a member from a project:
-
Using the Unassign Button:
-
Step 1: Go to the Members section on the Project Details page.

-
Step 2: Locate the member you want to remove and click the Unassign button. It'll appear a confirmation popup.

-
Step 2: Confirm the action by clicking Yes in the confirmation dialog.

-
Step 1: Go to the Members section on the Project Details page.
-
Using the Edit Project Button:
-
Step 1: Click the Edit button on the page. It'll popup a form to edit the project.
-
Step 2: In the Assigned Members list, remove the member. It'll remove the member from the list.

-
Step 3: Click Submit button to update the project.

-
Step 1: Click the Edit button on the page. It'll popup a form to edit the project.
Managing member assignments in a project is simple and flexible in TimoDesk. Whether you use the Edit Project option or the Member List card, you can easily add the right people to the right projects. And if a member no longer needs access, the Unassign button allows you to remove them instantly with a quick confirmation.
By keeping project assignments up to date, you ensure accurate time tracking, clear responsibility, and a more organized workflow for your entire team.
How to Create a Task?
Tasks help you break down project work into smaller, manageable units. Each task can be assigned to one or more members, and its time usage will be reflected in the project's overall performance.
-
Step 1: Go to the Project Details Page
Navigate to Projects from the sidebar and click on the project where you want to add tasks. This will open the Project Details page.
-
Step 2: Locate the Tasks Section
Here you will see the existing task list, including task names, assigned members, total worked hours, and action buttons.
-
Step 3: Click the Add Task Button
On the top-right corner of the Tasks card, click Add Task. This will open a popup window where you can create a new task.
-
Step 4: Fill Out the Task Details
-
Task Title
Enter a short, clear name for the task. -
Assign Members
Select one or multiple members who will be responsible for this task.
You may also click Add All to assign every project member at once.
Once the information is complete, click Submit to save the task.

-
Task Title
Task creation is an essential part of organizing and monitoring work within a project. By breaking the project into tasks and assigning the right team members, you ensure clearer responsibility, better tracking, and more accurate reporting. Effective task management helps your team stay aligned and improves your overall productivity within TimoDesk.
How to Assign or Unassign a Task?
Assigning tasks helps you define responsibility within the project. Only members already assigned to the project will appear in the task's member list.
How to Assign a Member to a Task
- Step 1: Go to the Project Details Page.
- Step 2: Scroll down to the Tasks section.
-
Step 3: Click the Edit Button
Click the button next to the task you want to modify. It'll open the Task Edit Popup.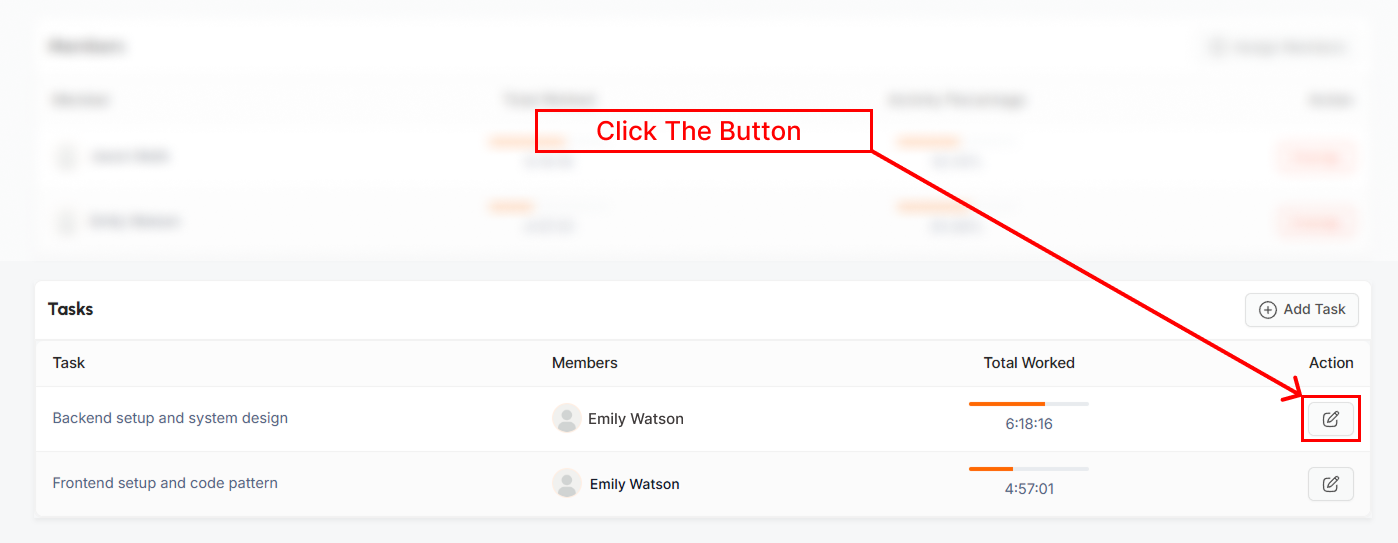
-
Step 4: In the Assign Members field, choose one or multiple members from the list.
- Only members assigned to this project will appear here.
- You can use Add All to assign every member of the project.

-
Step 4: Click Submit to save the changes.
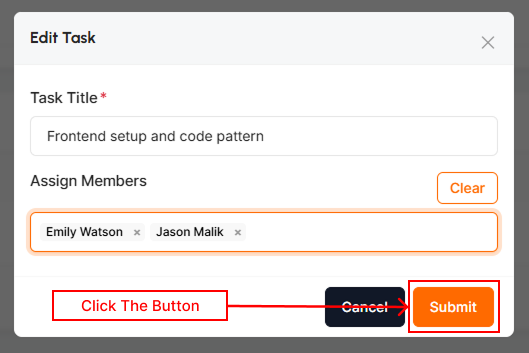
The selected members will now be assigned to the task and can track time under it.
How to Unassign a Member from a Task
- Step 1: Go to the Project Details Page.
- Step 2: Scroll down to the Tasks section.
-
Step 3: Click the Edit Button
Click the button next to the task you want to modify. It'll open the Task Edit Popup.
-
Step 4: In the Assign Members field, remove the member you want to unassign.
- This will detach them from that specific task.
- You can use Clear button to unassign all members from the project.

-
Step 4: Click Submit to save the changes.

The unassigned member will no longer appear under the task, and they won't be able to log time for it.
Task assignment ensures clarity and structure within your projects. By assigning the right members, you enable proper tracking, responsibility distribution, and organized workflows.
You can update task assignments anytime through the edit modal, giving you full flexibility in managing project work.