Support Tickets
The Support Tickets page is the central place to contact the TimoDesk support team and track all your support conversations in one workspace. It helps you report issues, request assistance, and follow updates until the problem is resolved.
Support Tickets Preview

Why Support Tickets?
Support Tickets in TimoDesk provide a structured and reliable way to communicate with our support team whenever you need help. Instead of informal messages or emails that can be missed or delayed, the support ticket system ensures every query is properly tracked, reviewed, and resolved.
Purpose of the Support Ticket System
-
Get timely assistance
Report technical issues, bugs, or unexpected behavior directly to the TimoDesk support team. -
Request help or clarification
Ask questions about features, settings, billing, or system behavior with clear context. -
Track query progress
Each ticket has a status (Open, In Progress, Resolved), so you always know what's happening. -
Maintain a communication history
All replies, updates, and actions are stored in one place for future reference.
When Should You Create a Support Ticket?
You should use the Support Ticket system if you need to:
- Report system errors or performance issues.
- Request feature explanations or usage guidance.
- Report incorrect data, tracking, or calculation issues.
- Ask about billing, invoices, or payments.
- Share feedback or improvement suggestions.
Why This Matters?
Using support tickets helps both you and the support team:
- Queries are handled systematically, not lost in chats.
- Problems are prioritized based on severity.
- Faster resolution through clear, documented communication.
- Better long-term product improvement through tracked feedback.
How to Open a Support Ticket?
The Support Ticket system in TimoDesk is designed to help you communicate directly with our support team in a structured and trackable way. By opening a ticket, you ensure that your query is properly categorized, prioritized, and handled by the right department.
-
Step 1: Navigate to the Support Tickets page
From the left sidebar, go to Support → Support Tickets. This page shows all your existing tickets along with their status, priority, and last reply time.
-
Step 2: Create a new ticket
Click the “New Ticket” button located at the top-right corner of the page. This will open the ticket creation form.
-
Step 3: Fill in the ticket details
You will need to provide the following information carefully:-
Subject
A short and clear title describing your query.
Example: “Unable to sync desktop app” or “Invoice not generated for December”.
-
Department
Choose the department that best matches your query. This helps route your ticket to the correct support team:- General - For general questions, guidance, or non-technical clarifications about TimoDesk features.
- Sales - For inquiries related to pricing, plans, upgrades, questions.
- Technical - For bugs, errors, app issues, tracking problems, or anything not working as expected.
- Billing - For invoices, payments, subscriptions, and transaction-related concerns.

-
Priority
Set how urgent the query is:- High - Critical queries that block your work or affect core functionality.
- Medium - Important queries that should be addressed soon but are not blocking.
- Low - Minor queries, questions, or suggestions that do not require immediate attention.

-
Message
Describe your query in detail. Include what you were trying to do, what actually happened, and any error messages if available. Clear descriptions help us resolve your query faster.
-
Attachments (optional)
You can upload screenshots, documents, or logs to support your explanation.
Supported formats include .jpg, .jpeg, .png, .pdf, .doc, .docx, and you can upload multiple files if needed.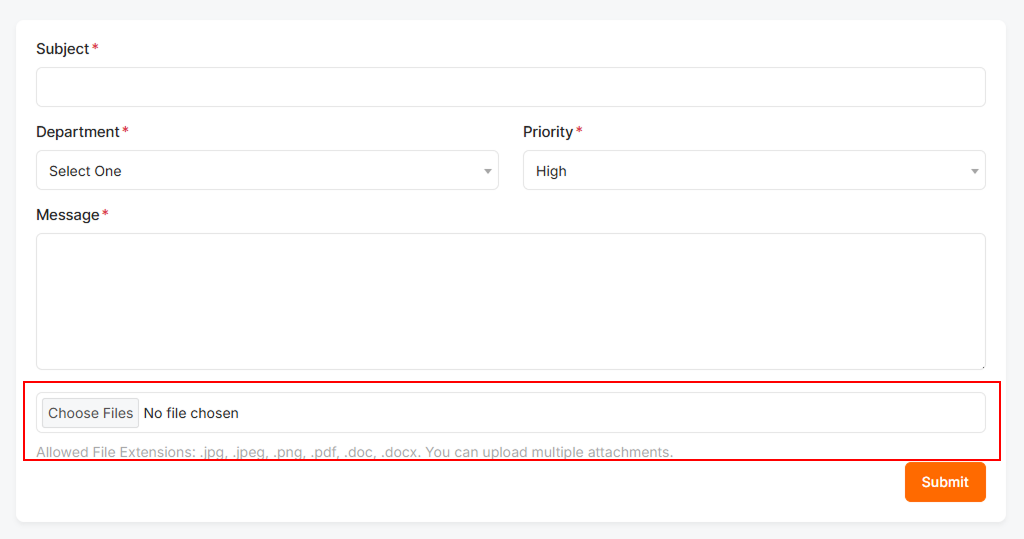
-
Subject
-
Step 4: Submit the ticket
After reviewing all details, click Submit. Your ticket will be created instantly, assigned a unique ticket ID, and you will be redirected to the Ticket Details page.
How Support Tickets Work in TimoDesk?
The Support Ticket system in TimoDesk is designed to provide a structured, trackable, and transparent way for organizations to communicate with the support team. It ensures that every issue, request, or question is properly recorded, reviewed, and resolved without confusion or data loss.
-
Ticket Creation
When a member faces an issue or needs assistance, they can create a support ticket from the Support Tickets page.
Each ticket includes essential details such as the subject, department, priority level, and a clear description of the problem. Attachments (screenshots, documents, or logs) can also be added to help explain the issue better.
Once submitted:- A unique Ticket ID is generated.
- The ticket status is set to Open
- The ticket becomes visible in both the user panel and the TimoDesk support system
This ensures that the request is officially logged and ready for review.
-
Support Team Review & Response
After a ticket is created, the TimoDesk Support Team reviews it based on:
- Selected department (General, Technical, Billing, Sales)
- Priority level (Low, Medium, High)
- Provided description and attachments
A support agent then responds directly within the ticket thread.
All replies are recorded in chronological order, creating a clear conversation history between the user and the support team.
Members can:
- View agent replies
- Respond with additional information
- Upload more attachments if needed
This two-way communication continues until the query is fully resolved.
-
Ticket Resolution & Closure
Once the problem has been solved or the request has been completed, the ticket can be closed.
Closing a ticket indicates that:
- The query no longer requires action
- The conversation is finalized
- The ticket is archived for future reference
Closed tickets remain accessible in the Support Tickets list, allowing users to review past queries, solutions, and discussions whenever needed.
Support Ticket Status Explanation
Each support ticket in TimoDesk has a status that reflects its current stage in the support process. Understanding these statuses helps users track progress and know when action is required.
Open Status
- The ticket has been successfully created.
- It is waiting for a response from the TimoDesk support team.
- No support agent has replied yet.
Meaning
Your request has been received and is in the support queue.
Answered Status
- A TimoDesk support agent has responded to the ticket.
- The system is now waiting for your feedback or confirmation.
Meaning
Support has provided a response, solution, or question, and your attention is required.
Customer Reply Status
- The user has responded after a support agent’s reply.
- The ticket is again awaiting review from the support team.
Meaning
You have replied, and the support team will continue working on your query.
Closed Status
- The query has been resolved or the request has been completed.
- No further replies are expected unless the ticket is reopened.
Meaning
The support process is complete. The ticket is archived for record-keeping.
What Shows the Support Ticket Page?
The Support Ticket List provides a clear, structured overview of all your submitted support requests. It helps you quickly track the status, priority, and recent activity of each ticket, ensuring smooth communication with the TimoDesk support team.
-
Subject
Displays the ticket title along with a unique Ticket ID (e.g.,#747200). This helps you easily identify the query at a glance. Clicking the subject or the Details button opens the full ticket conversation.
-
Department
Shows which support department the ticket was assigned to (e.g., General, Technical, Billing, Sales). This indicates the type of query and the team handling it.
-
Status
Indicates the current state of the ticket:- Open - Ticket has been created and is awaiting a response.
- Answered - A support agent has replied and is waiting for your feedback.
- Replied - You have responded and the ticket is pending further action from support.
- Closed - The query has been resolved and the ticket is finalized.

-
Priority
Shows the urgency level set when creating the ticket:- High - Critical queries requiring immediate attention.
- Medium - Important but not blocking.
- Low - Minor questions or general inquiries.

-
Last Reply
Displays how long ago the most recent response was made. This helps you understand ticket activity and response timelines at a glance.
-
Action
The Details button allows you to view the full ticket, reply with additional information, upload attachments, or close the ticket if the query is resolved.
Overall, the Support Ticket List acts as your central control panel for managing support communication efficiently, transparently, and without losing track of any query.
What Shows the Support Ticket Details Page?
The Ticket Details page provides a complete, chronological view of a single support ticket. It is the central place where you can review ticket information, communicate with TimoDesk support, and manage the ticket lifecycle until resolution.
-
1. Ticket Information Panel
This section gives a quick summary of the ticket’s core metadata so you can understand its context at a glance:- Ticket ID - A unique identifier for tracking and reference.
- Department - The support category the ticket belongs to (e.g., General, Technical, Billing).
- Status - Current state of the ticket (Open, Answered, Replied, Closed).
- Priority - Importance level of the ticket (Low, Medium, High).
- Opened At - Date and time when the ticket was created.
- Last Reply - Timestamp of the most recent response.
This panel helps you quickly assess urgency and progress without scrolling through the conversation.

-
2. Conversation Timeline
The conversation area shows the full message history of the ticket in chronological order.- Messages from you and TimoDesk support agents are visually differentiated for clarity.
- This threaded layout ensures transparent communication and preserves the entire discussion for future reference.

-
3. Reply Box
The reply section allows you to continue the conversation while the ticket is open.- Message field - Write additional details, clarifications, or follow-up questions.
- Attachments - Upload supporting files such as screenshots, documents, or PDFs (multiple files supported).
- Reply button - Sends your response and updates the ticket status accordingly.
This ensures ongoing collaboration until the query is fully resolved.

-
4. Ticket Actions
From the Ticket Details page, you can manage the ticket’s lifecycle:- Reply - Continue communication with support.
- Close Ticket - Mark the ticket as resolved when your query is fully addressed.
This ensures ongoing collaboration until the query is fully resolved.
